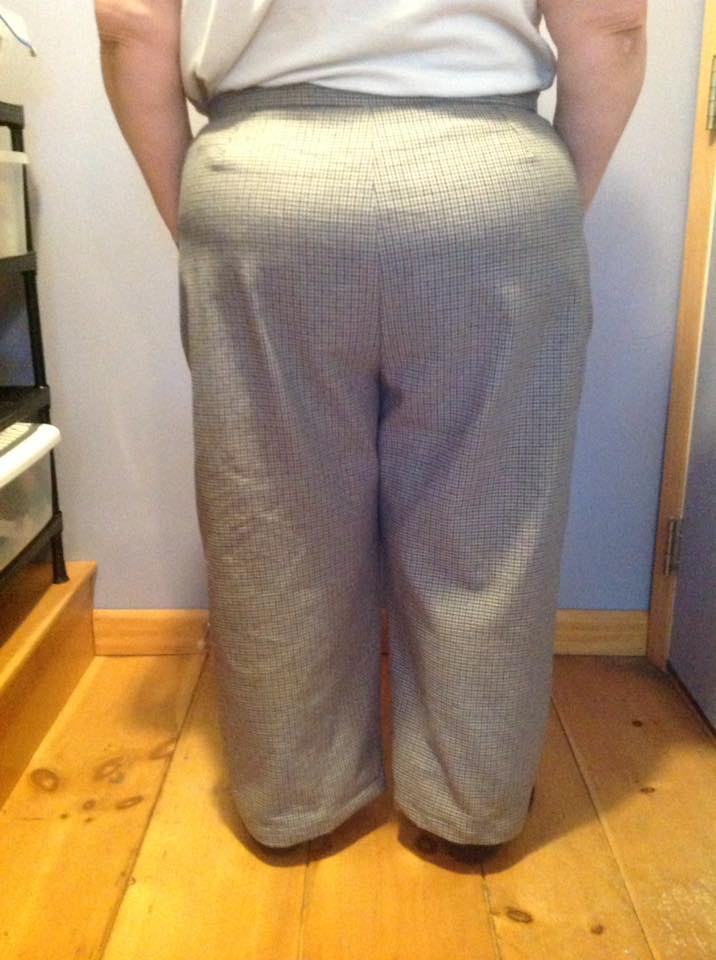
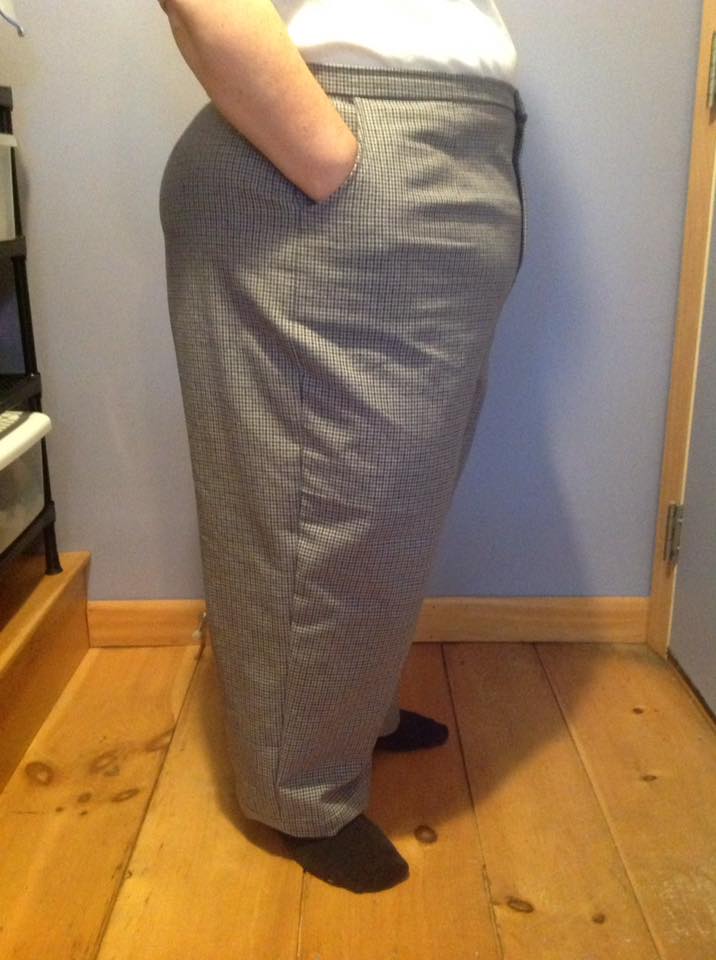
Well, there comes a time in every quilters life when you find yourself, buried in quilts. This past year I recently downsized and moved and found I had about 3 times as many quilts as I could ever need or store. I have been funneling my efforts more and more into fashion or garment sewing. Pants have eluded me. But, this month, I finally managed to put together a comfortable nice fitting pair of pants, with pockets and a fly front.
Being a short obese older woman, has made finding comfortable fitting pants difficult. I spend much of my time in stretch knit pants when I am home, and in skirts and dresses when I travel out. Ready to wear just does not come close enough to my unique shape. Being from the northeast, I miss the warmth of pants in the winter most of all. So, I started my quest for perfect pants pattern.
I tried several published pants patterns, by the Big 4 pattern companies, and several independent pattern companies, trying to use only patterns that included my waist and hip measurements. But, nothing fit and looked quite right, until I used the Sure Fit Designs system and drafted my own pants pattern. My first muslin was very very close, and my second muslin was wearable.
For the gory details, my measurements are 45″ waist, 55″ high and low high hip, 5’4″ tall, with short inseam, and a very challenging crotch curve. I am intermediate sewist, and this was my very first fly front. I am planning on making my next pair in blue gray twill, and my third pair in a lovely black linen. The thought of comfortable pants in cool and attractive material has me over the moon.
The Sew-A-Longs & Sewing Contests Facebook group has been a constant source of inspiration for me, for the past few months. In January I spent a month, drafting a pattern for a well fitted shirt from scratch. Although I have been reading, watching you tube videos, and taking Craftsy classes, the monthly sew-a-long offered in January was a must do for me. I love the deadline, and David Coffin, was hosting the event, giving feedback and expertise throughout the month. I ended up with a pretty nice shirt. Even more importantly, a pattern which fits me perfectly, and now I have the knowledge needed to transform it into many different items. It has been a very long time since I have had such an empowering and satisfying experience.
Next up for me is a four month long Sew-A-Long which consists of a themed wardrobe containing 8 pieces to be completed between February and May. Details can be found on the group’s Facebook page. So, three weeks in and I was still struggling to put together my game plan. And then it occurred to me, I do not want just a new wardrobe, I want a makeover. I am petite, plus size pear shaped 50+ gray haired old lady. I have never planned a wardrobe in my lifetime. Clothes shopping consisted of finding the correct combination of colors, textures, price, value, and ease of care. Fit was never great for me, so I gave up and tolerated what ready to wear had to offer. I settled for over-sized tops, to fit my over-sized waist, hips, and butt. Shapeless pants that never seem to find my waist, while clinging to my hips and thighs and pooling on the floor. They do not make a pair of pants, stretch or otherwise that does not need multiple adjustments just to make them wearable, forget about comfort and fit. Needless to say clothes and fashion were never an area that interested me, and to be honest it showed. David Coffin started his shirt sew-a-long posing the question; do you remember a favorite shirt? I did. It was a cream colored linen shirt. I loved how I felt when I wore it. It was retired when the kids came along due to its impracticality, and finally lost over the years, I remembered how it felt to look in my closet, and see that shirt, and slip it on, and wear it all day. It just made my day better. That is what I wanted for my new wardrobe. I wanted to open the closet door, and feel the excitement, and pleasure that comes with wearing something you truly treasure. No one manufactures these clothes. I cannot afford to have someone else design and make them for me.
So here goes, my Sew-A-Long Seasonal Wardrobe, is about bringing excitement and pleasure back to clothing for me. Again I turned to the internet to find the styles that I could get excited to wear. That is when I discovered Lagenlook. It is a German word, which means a layered look, and it has been a popular look in Europe for some time. To me it is both comfortable and stylish. Layering allows you to mix and match and be creative each time you go to put an outfit together. Now, I was truly getting excited. I still face challenges. My size and shape force me to give extra consideration when choosing items to avoid many common pitfalls. But for the first time, I thought I could open my closet and really like what I saw. What a way to start each day!
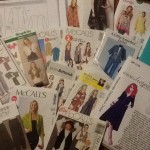
Here is what I decided to do for my eight pieces.
1. Structured pair of pants. I have narrowed this down to two patterns. Vogue 8499 by Marci Tilton. Will need considerable re-sizing. Second choice is Burda 7400. Using Linen.
2. Structured skirt – Vogue 8499 by Marci Tilton. Will need considerable re-sizing.
3. Jumper – Still looking for a pattern for this… I want inverted curved seam at bust heading down toward waist, then with hi lo hem mid-calf length. Loose and light so it is easy to layer.
4. Short Cardigan – Simplicity 2183 or McCall’s M6845
5. Boxy Short Jacket – Still choosing between Burda 8108 or Kathleen Chatham’s Jacket pattern found in Singer’s Perfect Plus book or A Little Something Jacket by CNT Pattern Co.
6. Long flowy vest – Choosing between three options: sleeveless version of my self-drafted shirt with, larger arm holes, or McCalls M6084, or Vogue V1375
7. Dress – Inverted rounded seam from breast to waist, shaped hem, or Hot Patterns 1179 Weekender Chameleon Dress
8. Tunic(s) – Multiple lengths – shaped hems. Style Arc Daisy Designer Tunic, Burda 6786,
Extra Credit
9. Short loose vest – wool or linen in McCall’s 2260
Will probably purchase Knit tee shirts for layering, Leggings, Scarves, Pair of shoes – flat, comfortable, all weather. I am not a feminine person in general. Hate make up, and frilly, or fancy stuff, but who knows before this is over I may even buy a necklace.
Well, I have almost completed, my second attempt at the knit tunic. I hand basted the sleeve and bottom hems, and the neckline. I need to thread the cover stitch machine and I am good to go. I know that many people pin or simply fold the hem, and use the seam guide to sew. Although faster, this has led to good but not great consistent results. I think about the cost of materials, my time, and the fact that I will be wearing this garment for hopefully a long time. I want the hems as straight and neat as I can make them. Also, sewing a pinned garment is tricky, you know either you are going to get stuck, or the needle may make contact with a pin, or both. Hand basting allows you to concentrate on sewing a good seam, without distractions. Be sure to hand baste close but not too close to seam to allow quick removal. I also recommend using a basting thread, which tangles much less than threads used for machine sewing.
For my second project, I drafted a pattern from a ready to wear jumper that I love but that is too large for me. I painstakingly placed the pattern paper over the top of each piece in the jumper, and pressed along the edges. I lifted the pattern paper, trued up the seams, and added the necessary seam allowances. I then compared all adjacent seams to verify they would align during construction. I put on the original garment, and pinned the adjustments needed for a better fit. I made these adjustments to the pattern pieces and verified the adjacent seams were still compatible. I selected a nice corduroy, similar to original garment and cut it out. I contemplated the steps needed to construct this garment. Studying the garment itself, and referring to patterns I had on hand, I formulated a plan. The garment went together fairly well, with only a few detours. As I sewed, I would stop and try it on, to test the fit, and make adjustments if needed. Always be sure to make same adjustments to pattern pieces for future use. This garment included a front zipper, inverted box pleats, pockets, a collar, and a facing. I took it slow, I relied on hand basting to verify the steps prior to machine sewing, eliminating the need to pick stitches as well as making the machine sewing much more manageable. The results were very good. I noted my process, on the pattern pieces. I will definitely be making this garment again, and next time the finished results will be better, but for now I have a very nice jumper, in a fabric and a color of my choice that fits me. Wearing a garment that fits, and is in the color and fabric of your choice is a great feeling, well worth the time to take it slow, and take the extra steps of hand basting and test fitting.
Reorganized, or more accurately inventoried my garment material. I then took stock of my patterns. After careful study, I narrowed it down, to a knit pattern with raglan sleeves. I started with my least favorie color and cheapest knit interlock, deep purple. I adjusted the pattern to fit my small busted, but ample bottom pear shape. The sleeves needed the most adjustment, having huge upper arms. I fiddled with it, making adjustments while being careful to maintain the adjoining seams. Proceeded to cut it out using the most fabric. Wasteful. I hate that. I serged the front, back, and arms together. Should have basted, first. Tried it on inside out. Neckline was too wide. I like my necklines tighter, to keep the drafts out in winter. The sleeves were 3 inches too long. There was extra fabric along the seam running from shoulder to arm pit both front and back. Pinned the seams tight enough to remove extra fabric, but still maintaining necessary wear ease. Serged the seam adjustments, trimmed sleeves, added collar. Coverstiched the neck, bottom hem, and sleeve hems. Looking back, I wish I had coverstitched the sleeve seams before installing the collar. The garment would lie better, but overall I have a wearable tunic. The color grew on me too! I transferred my alterations to my pattern pieces, and I am going to make a second tunic. When I am satisfied with the tunic, I will lengthen to a full length knit dress, which was my original goal. Something truly comfortable, that I could layer with jackets, vests, and scarves to dress it up.
After thoughts… Raglan sleeves are easier to install. Using contrast color for sleeves, introduces a set of slimming diagonals to the garment. Top thread should be darker rather than lighter shade of fabric. Top stitch sleeve seams for smoother finished look.
I am a retired computer professional, mother of two genius, self sufficient kids, wife to the best guy on the planet (there is no debate!), caretaker for two aging German Shepherds, lover of nature, and an OBSESSED sewer. For decades I squeezed in quilting, Halloween costumes, and home decor projects around my family obligations and jobs. Over the past couple of years I have branched out into garment making, and accessories such as bags and hats. Most of all I love fabrics, of all kinds. I love trims, and patterns, threads, and sewing notions and gadgets. My sewing area keeps expanding, and although it is in the basement of our lovely log cabin, it has expanded to fill almost every square inch of our basement. I love the challenge of design. The internet has brought the world to my finger tips, which is good because I live in the middle of nowhere. So I have it all. I have time, space, equipment, materials, and desire. Let’s see where this takes me.