Posted on 4 Comments

Jo and the Three Cashmerette Lenox Dresses

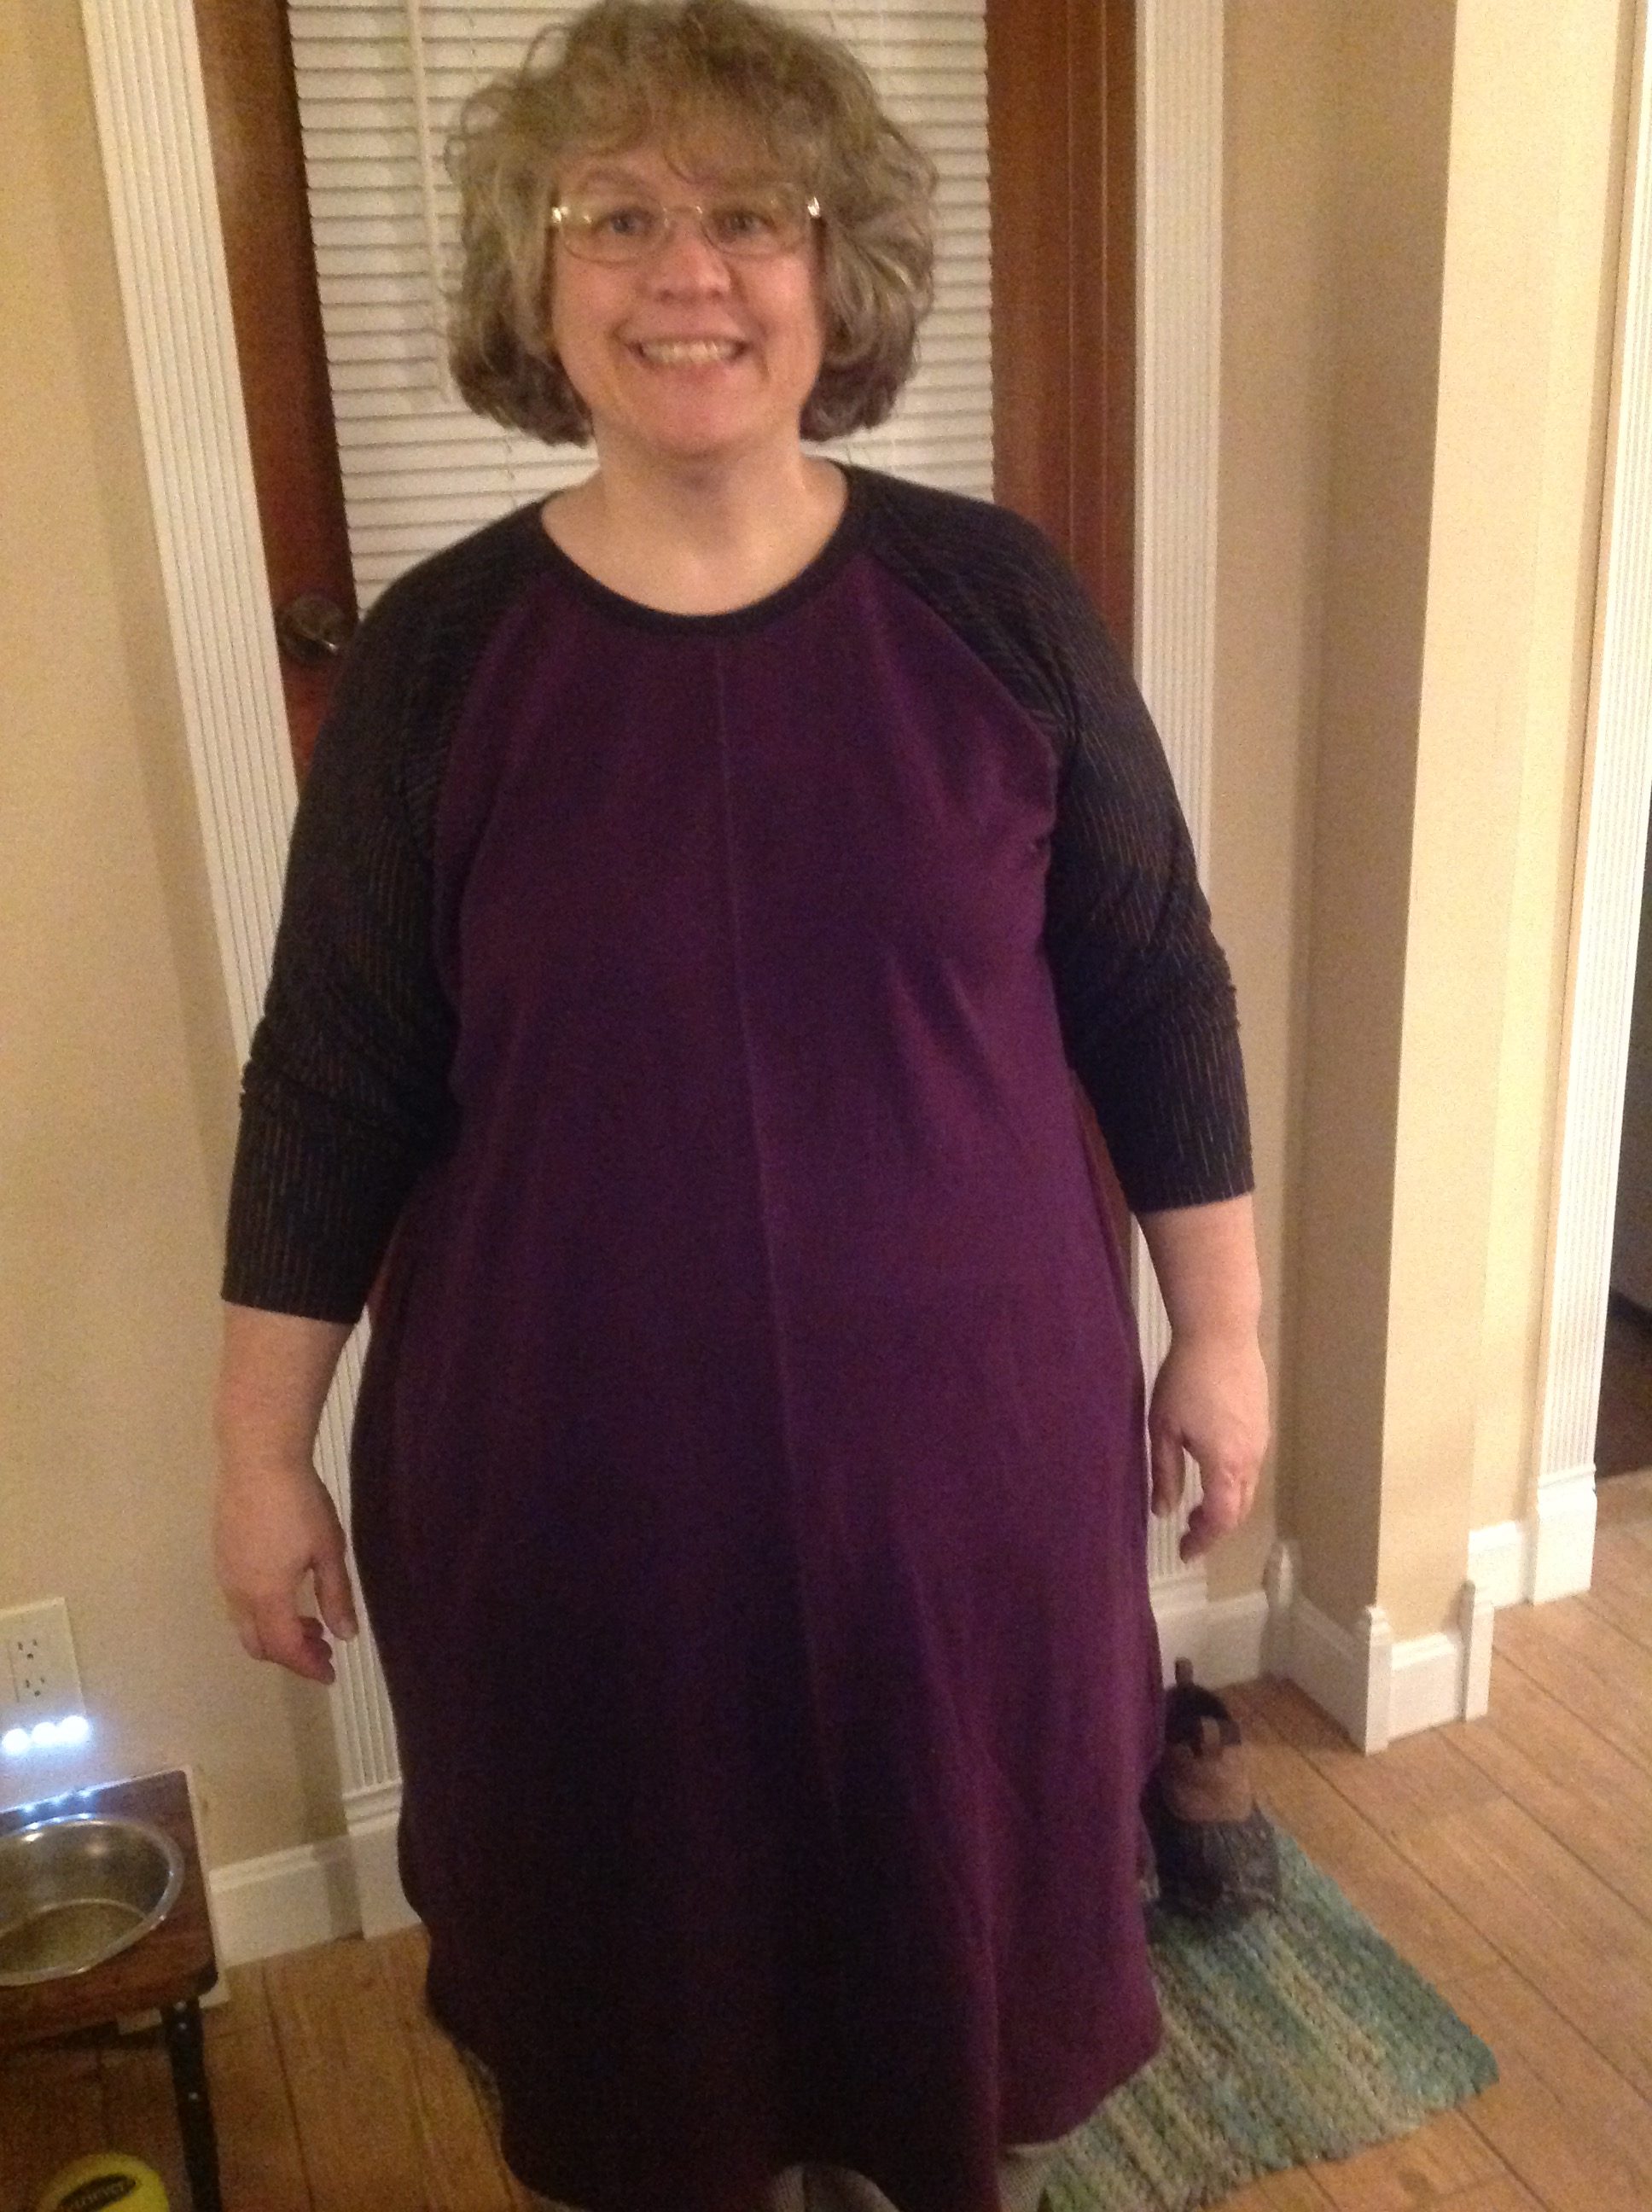
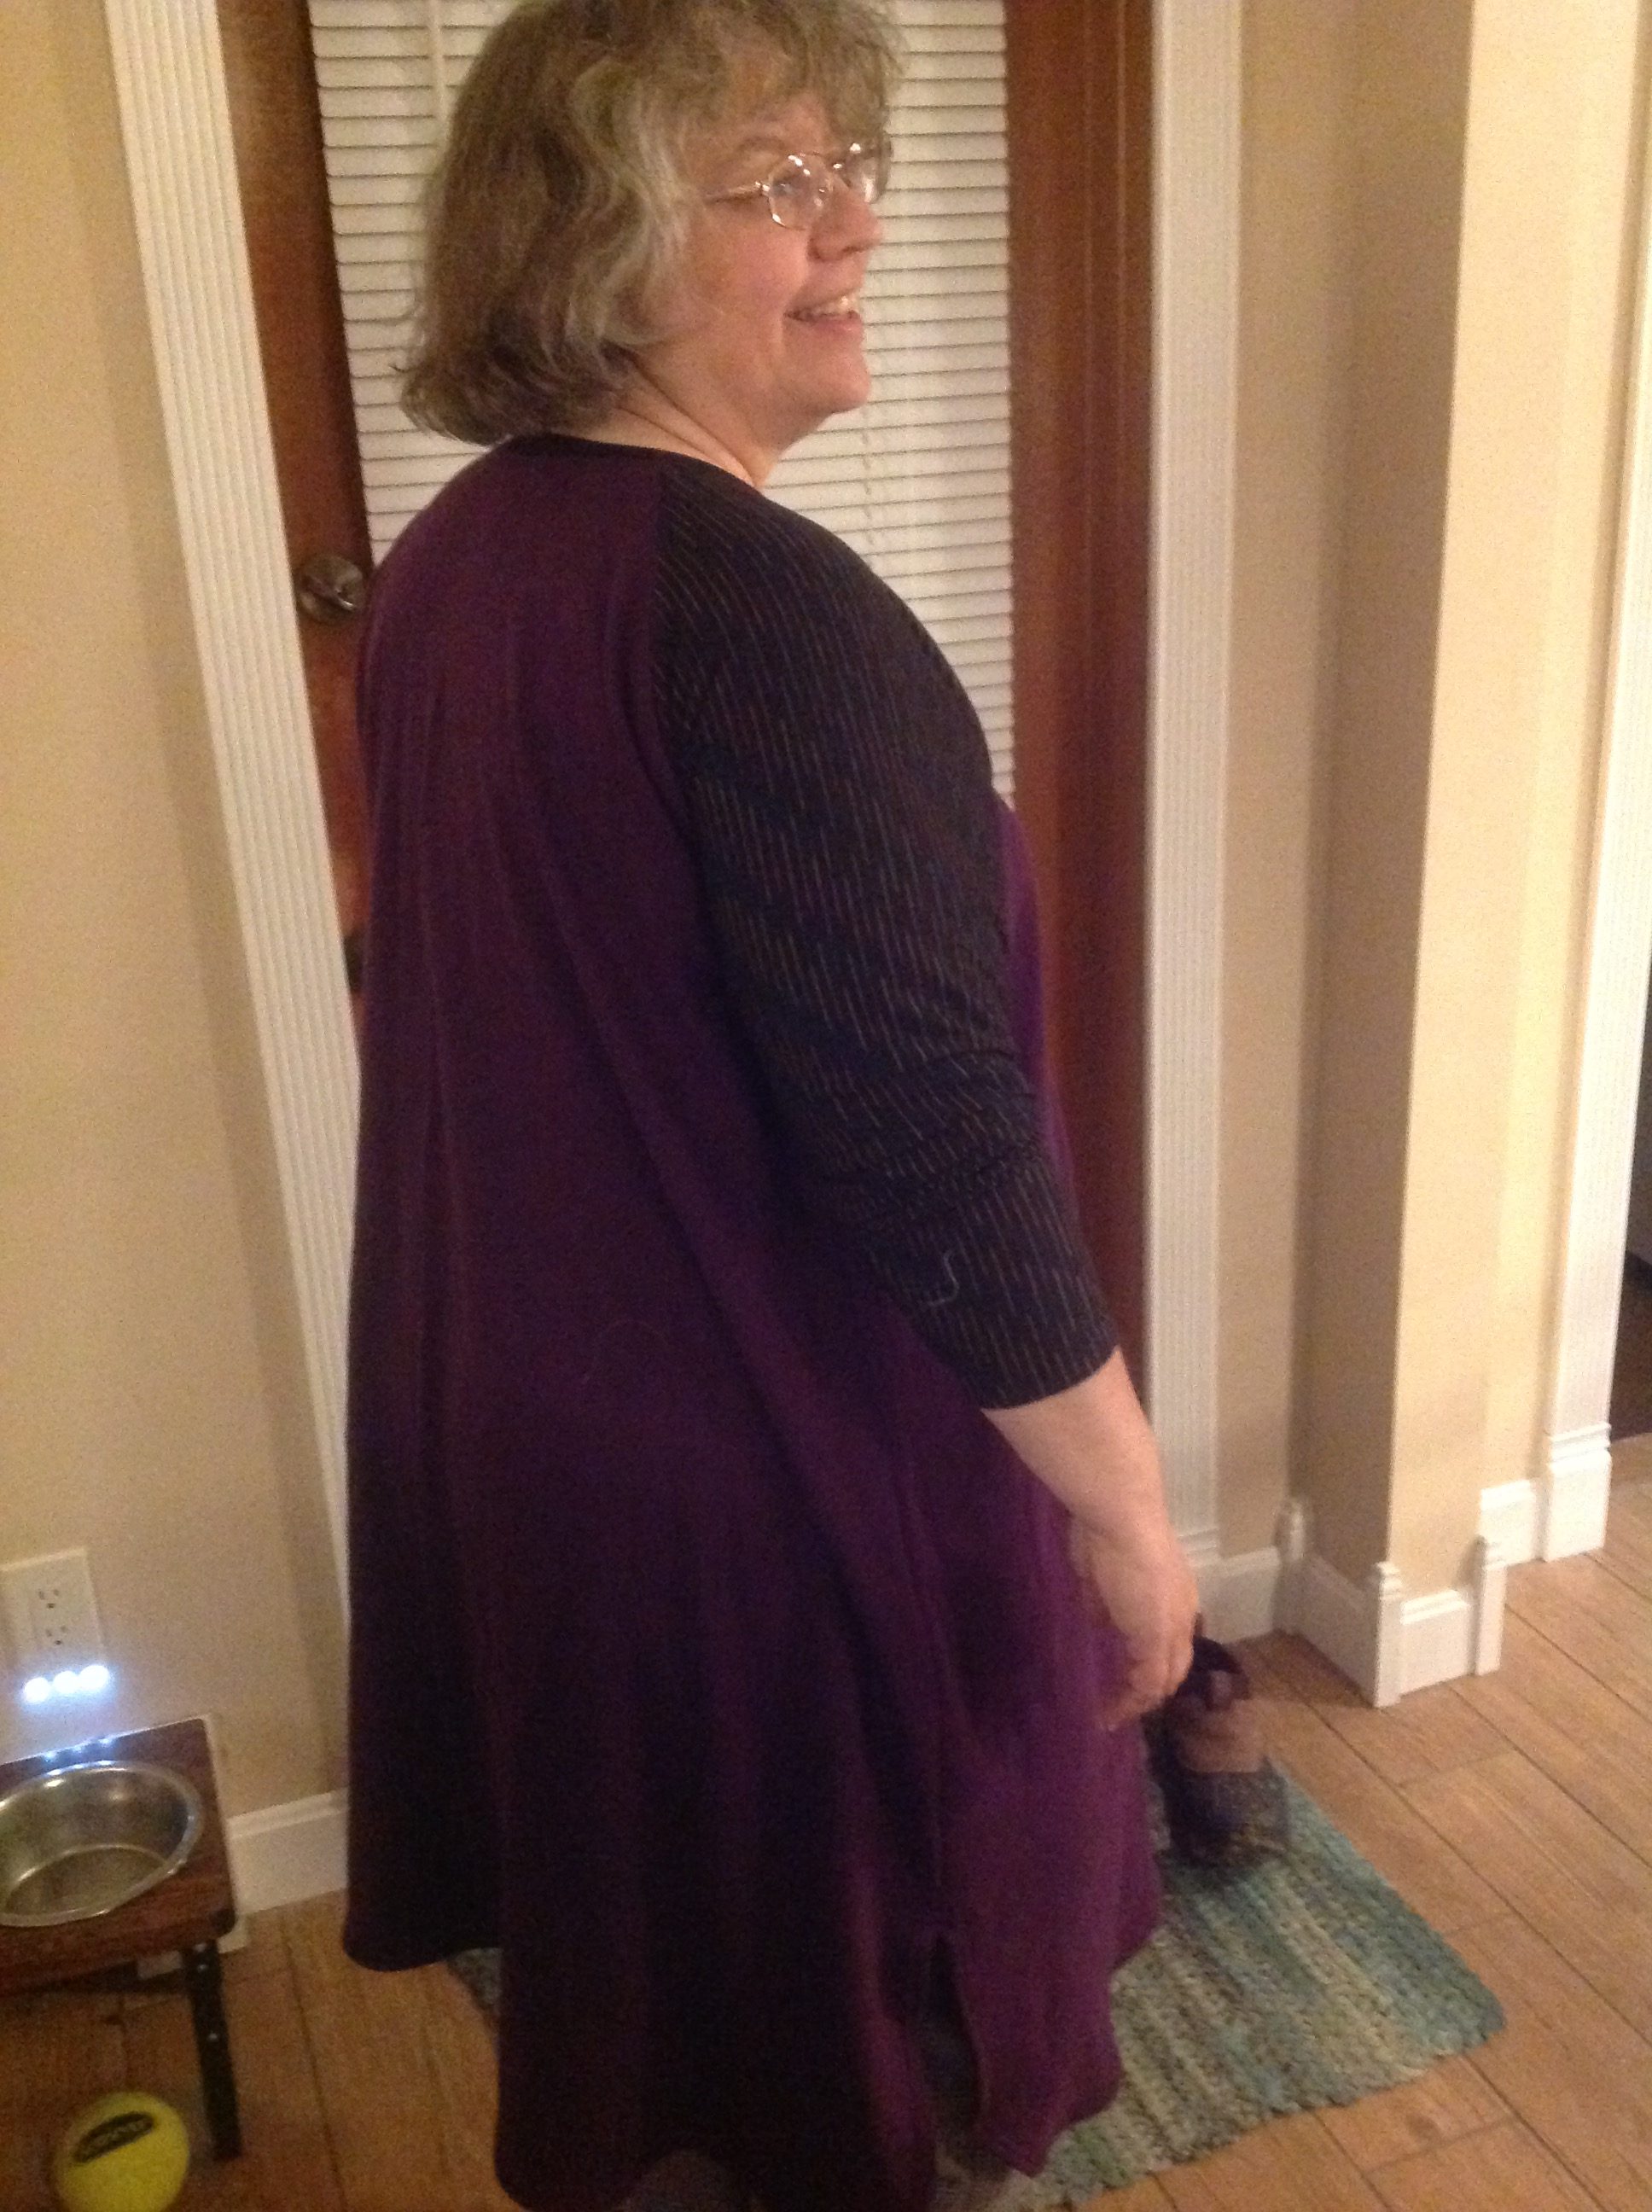
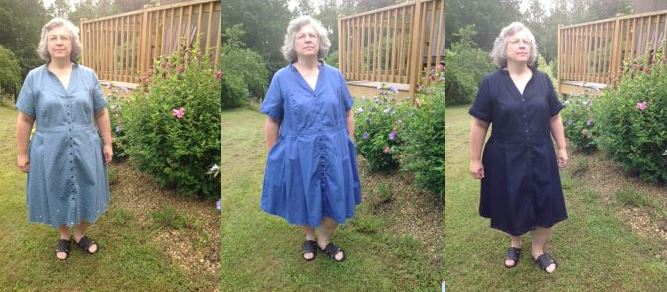
I started my first Lenox dress the day the pattern was released. I instantly fell in love with the waist definition and the lovely verticality of the front and back skirt pleats. The short sleeves were perfect for summertime while still offering coverage. The pockets were hidden yet functional. What was not to love? I am a short pear shaped woman, with C cup bust, 44 inch waist, and 54 inch hips. For my first attempt, I drafted a size 16 C cup top, onto a size 24 bottom. The sleeves were modified to be a bit longer and were a size 20 in front, and size 28 in back, to accommodate my large upper arms. It was a bit challenging, to alter the pattern without distorting the wonderful silhouette, but I got there, by distributing the added fullness throughout the bottom of the top pieces. I chose a directional mid weight cotton print for my first dress. Very soon, I was slipping into my first Lenox dress. Looking in the mirror it was love at first sight. I had found a way to show off my waist. Then, I sat down, and the love faded away. The waist was tight, and the buttons were strained. Not something I could wear out to dinner. I tried to think if I needed a standing only dress, and sadly the answer was no.

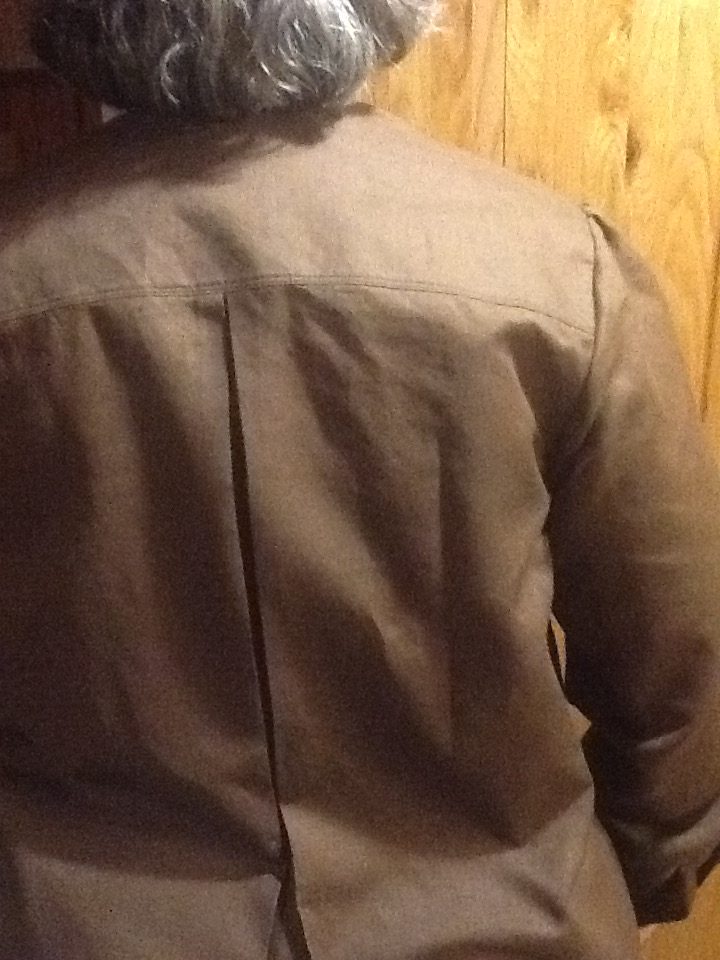
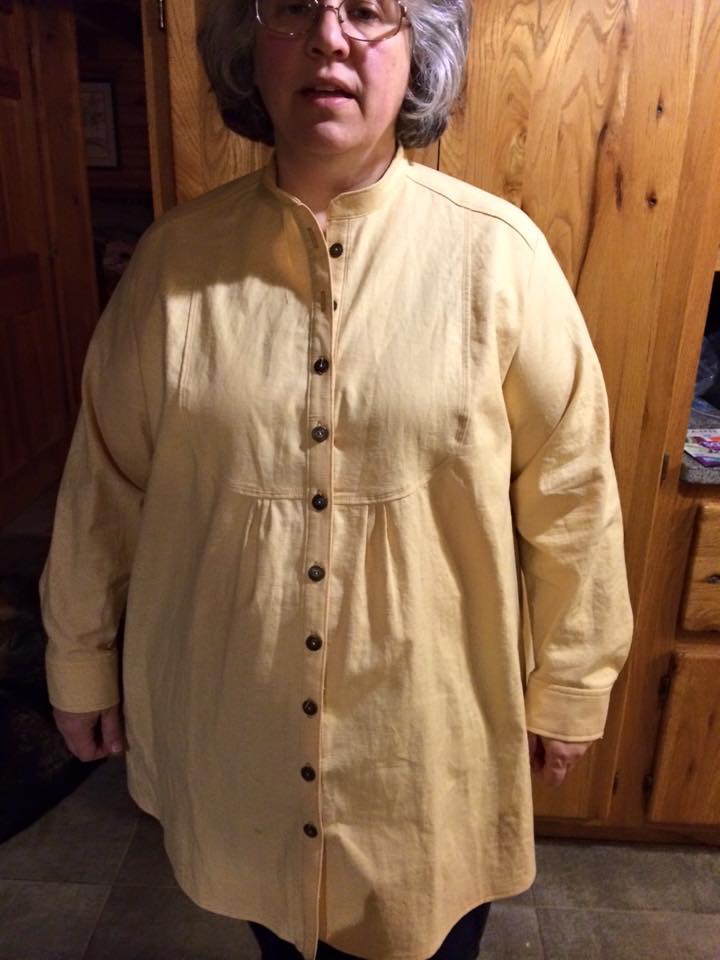
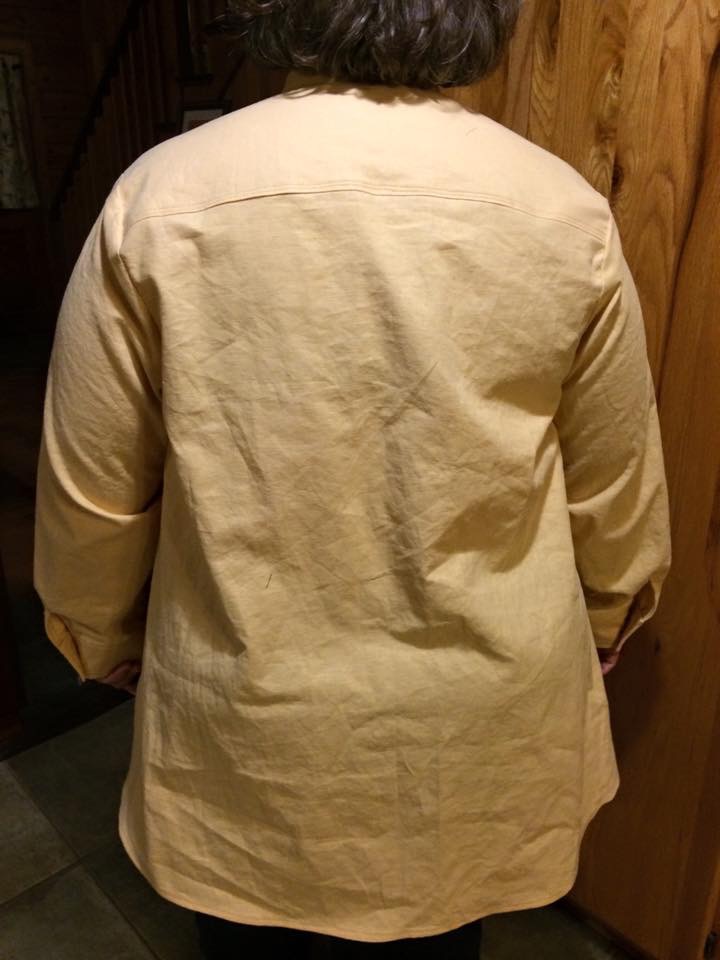
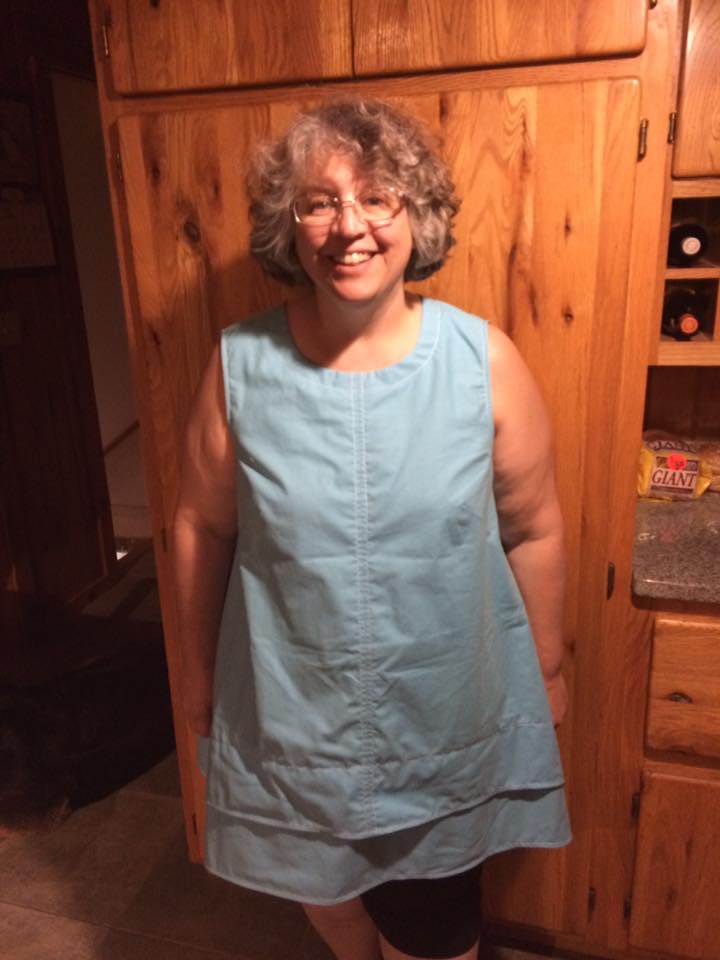
Undaunted, I quickly started on my second Lenox dress. This time I chose a mid weight linen. I measured my seated waist which was 3 inches larger, and re-drafted the pattern to accommodate the extra waist needed when seated. This resulted in a much more comfortable dress when seated, but the dress lost the lovely form fitting look when standing.

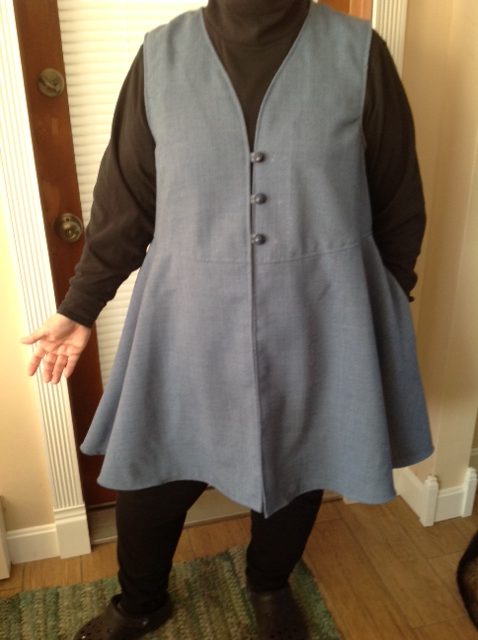
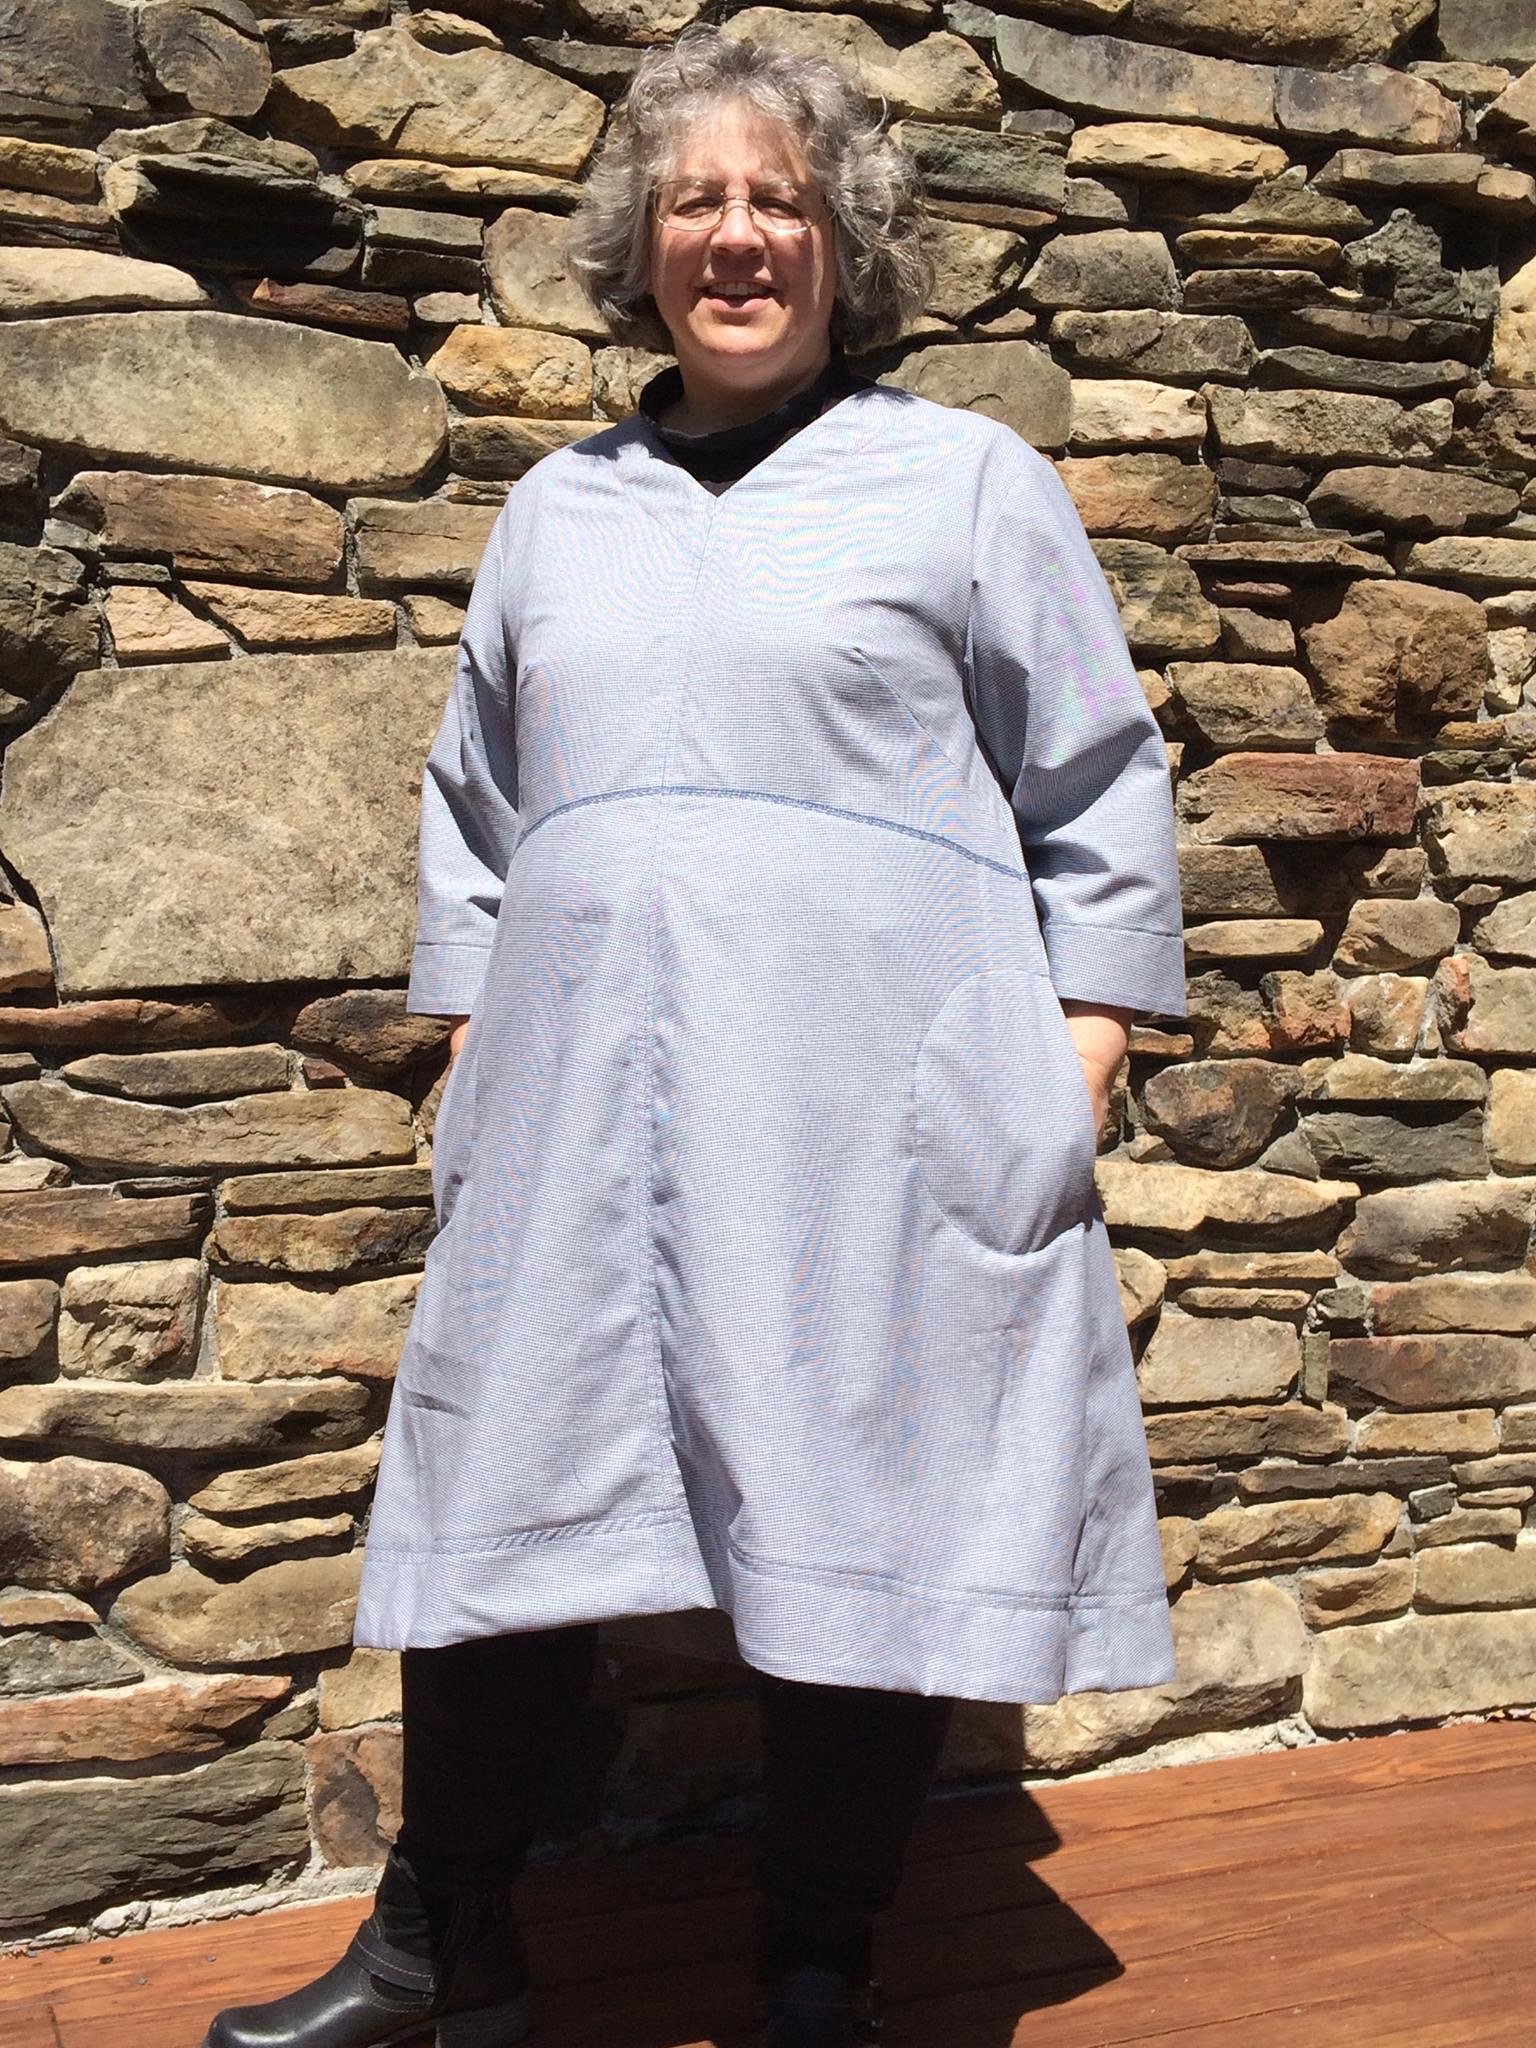
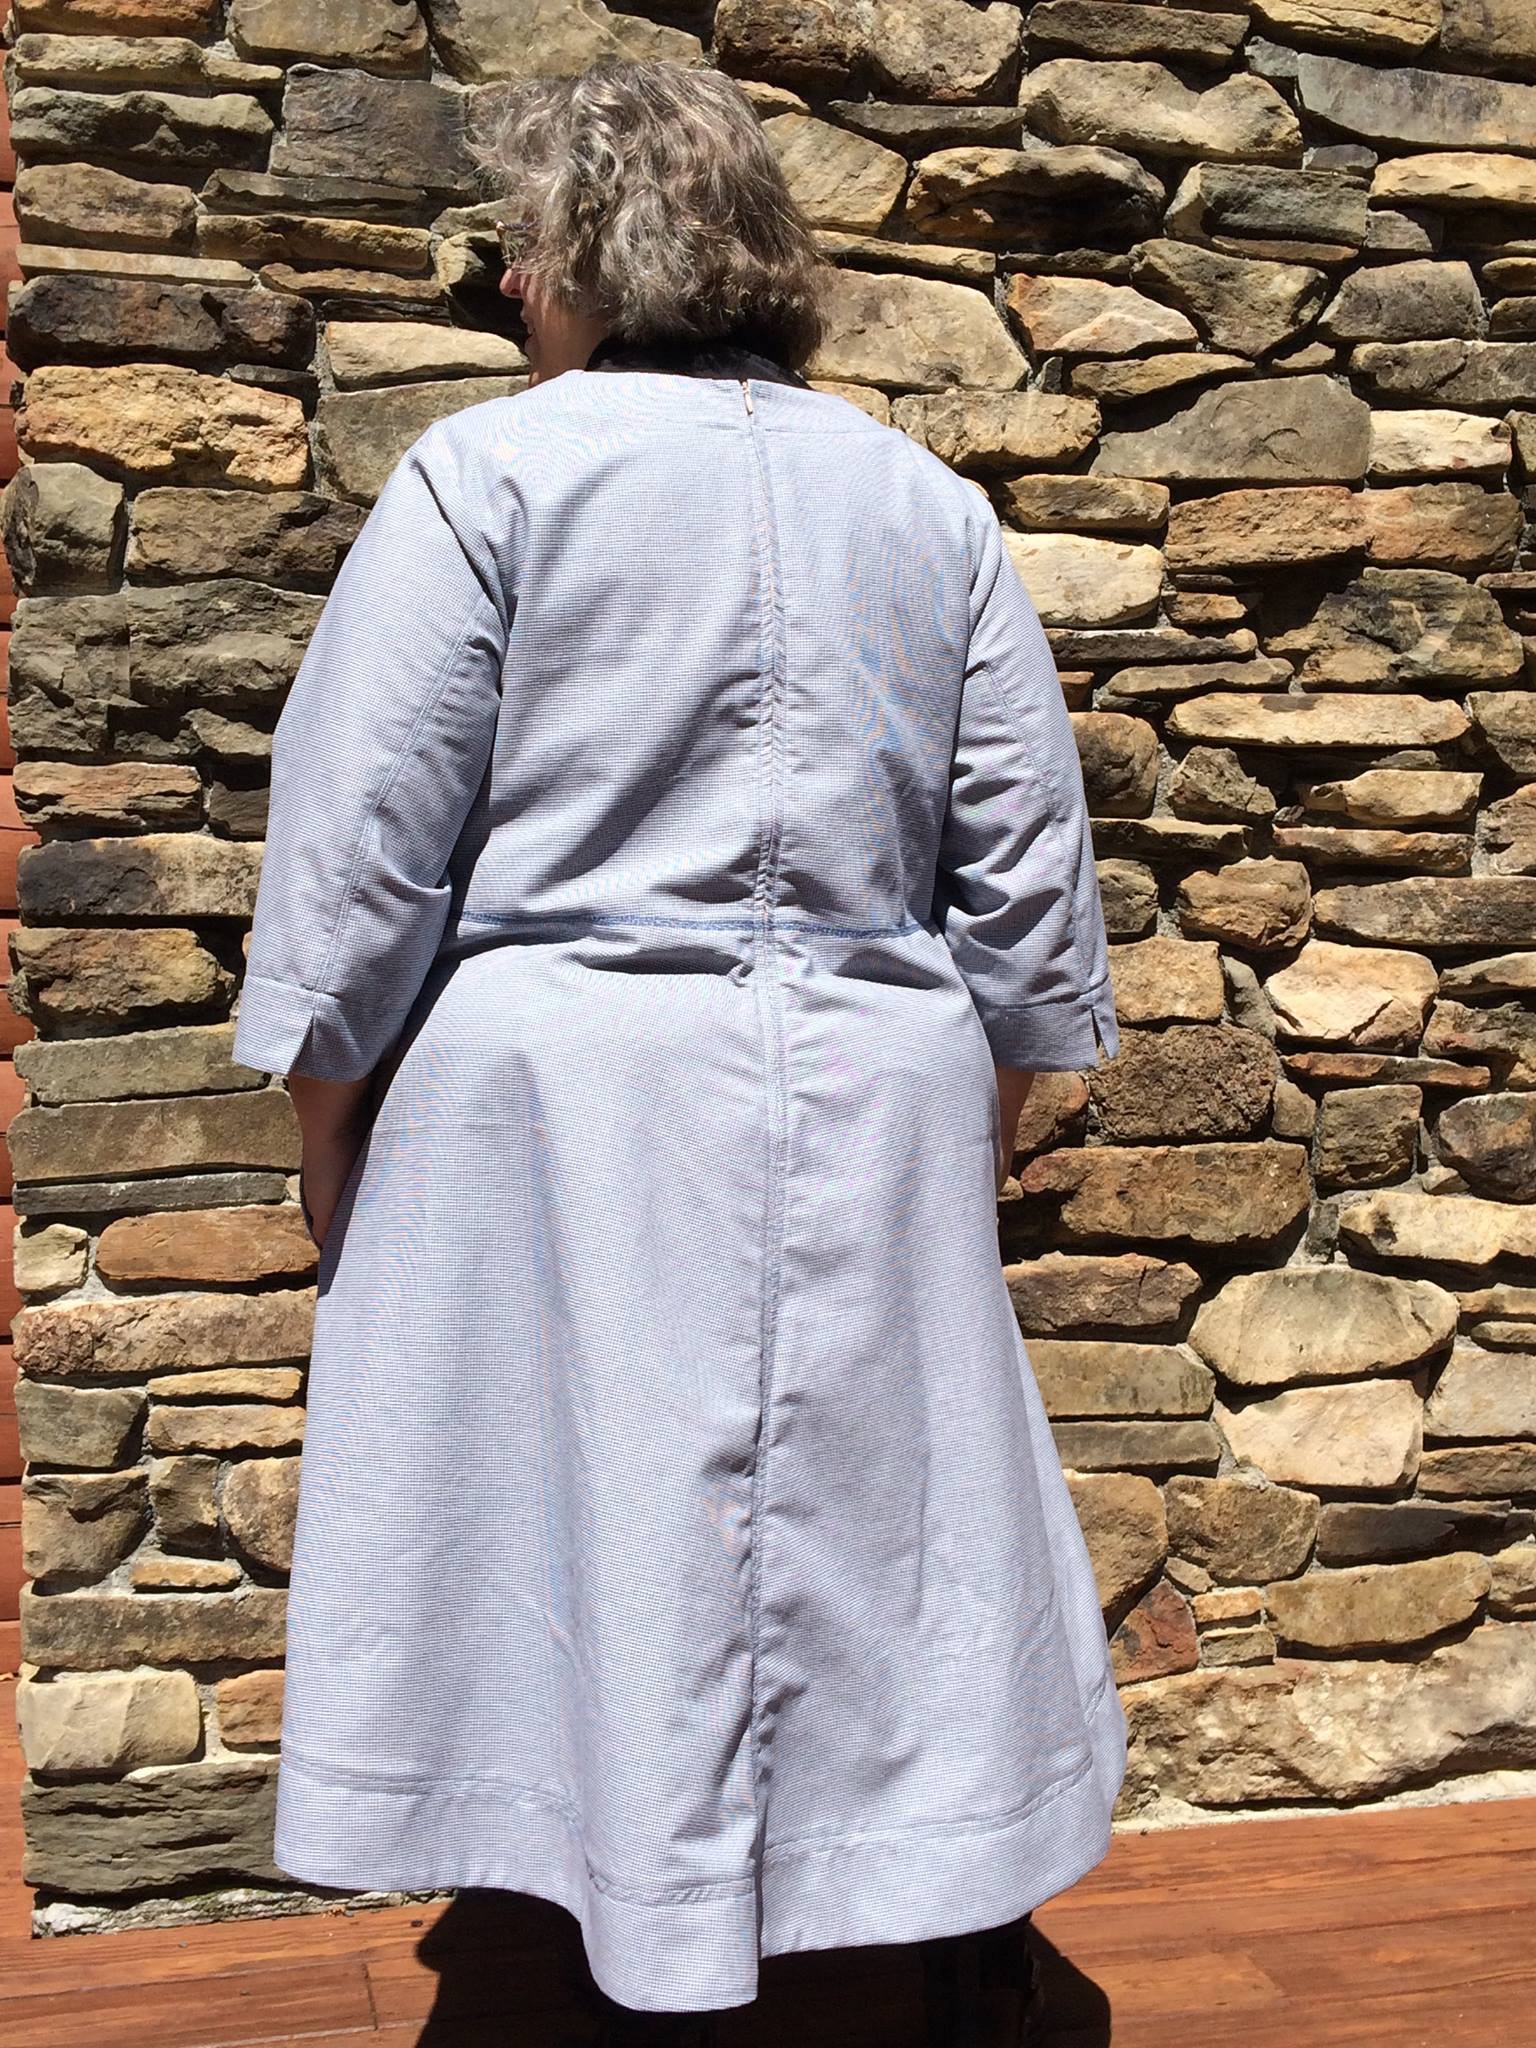
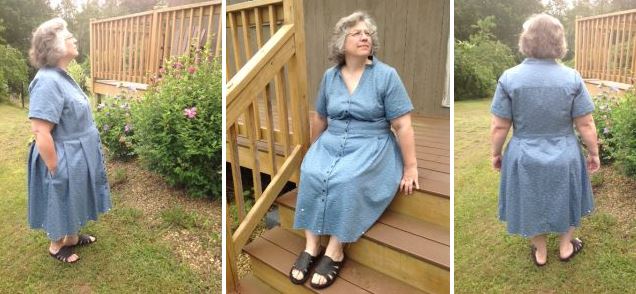
Discouraged, but not beaten, I was stumped until a gift certificate to my local fabric store arrived from my darling son. While shopping I came across a lightweight denim, with a bit of stretch, which soon became my third Lenox dress. To maintain some stretch in the waistband I used an interfacing made for stretch fabrics. I went back to my original drafted pattern, and success! The third dress had the tailored fit, and the stretch added the ease needed when seated.

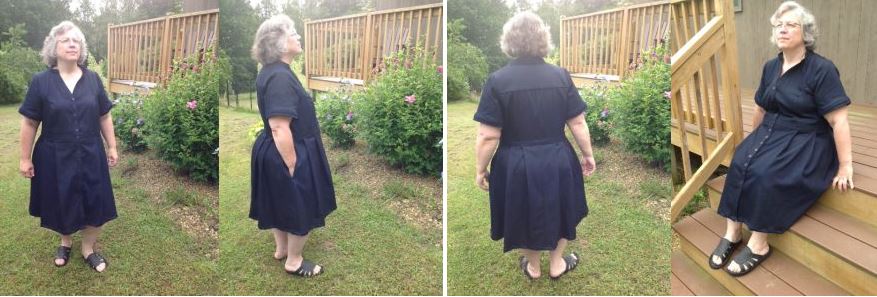
A  few cautionary notes regarding the process follow. The first time cutting out the dress I unwisely ignored the cutting layout suggestions which resulted in me needing additional yardage to accommodate the long front button bands. Despite the detailed description in the pattern I sewed the button bands on backwards the first time. Using directional fabric, I also accidentally sewed the one of the arm bands on upside down. All these were easily fixed with a stitch ripper and some time. I added both length and girth to my sleeve as my upper arms required it. I added additional buttons as well, as I like the look, and being pear shaped, I do not need to undo the buttons, as the dress easily slips on and off over the head. I really love my Lenox dress. It helped me find my waistline, and it makes me feel absolutely wonderful while wearing it. I highly recommend Cashmerette’s Lenox dress pattern.

Posted on Leave a comment

Butterick 6466 Open Vest

View A

View B

I spotted a sewn sample of Butterick 6466 pattern at Sew Expo in Puyallup, Washington, at Coni Crawford’s booth. It was love at first sight. Coni Crawford herself, measured my high bust and suggested that I fell into XL size. Even with my 43 high bust, C cup, 45 waist, and 54 hips, I thought she was crazy. Even more crazy, I bought the pattern on the spot for $12.

This pattern appealed to me, because I live in turtlenecks and leggings most days. I hate being seen in that outfit, so every time I answer the door or head out for errands, I change.  I had long dreamed of a cover up that could be kept handy for quick changes. This vest seemed the perfect all season answer.

I did a muslin of the upper top in 1X. The arm holes were too small, so I carved out the 3X arms, from the 1X top. I then, cut and sewed up a test garment in  a wool and synthetic blend fabric. It was soft gray blue. It did not hold a press, which I thought would make it wrinkle resistant which is what I was looking for. It was on the thicker range of the suggested fabrics.

There are two views to this pattern. View A is described as circle skirt vest with pockets. View B has a more modern trendy shaping to the sides, with no pockets. I chose to start with View A, as it seemed less likely to fall out of fashion, and I love pockets. The pattern also called for a snap closure, which I replaced with three buttons, and button loops. I felt this would keep the upper vest in place.

I liked my first version of the vest, except for the bottom hem, which was undulating. There was 3.75 inch dip at side seams from the center front and center back hems. I am fussy about hems, and that seemed bizarre to me. I measured. Checked my work, and found that the pattern indeed, had a difference from center to side seams. The top of vest, had a slightly undulating bottom shape, which I thought would partner with the skirt to make the final bottom hem more consistent, but alas it was not to be. I ended up leveling out the front hem, and allowing the back hem to dip down. This resulted in an attractive enough look, but it left the front of the cover up vest, not covering up as much as I had hoped. The hips area has an incredible amount of ease, which easily accommodated my 2X/3X hips, even though the skirt was cut at 1X.

View A – Side View

I did email Coni’s Crawford website, and asked about the hem. I got a very nice if not puzzling response back. She said to make sure to measure the full bust when selecting a size, and that View A was a circular skirt which could fall out like that depending on fabric used. She also said they had liked View B much better. I did too, as that was what I had seen a sample of at the Sew Expo.

I suspected that my adjustments to the armhole of the pattern top may have inadvertently effected the pairing of top and bottom, causing the bottom hem to be distorted. I decided to make View B, but not to alter that pattern, so I made up a straight size 1X with the only alteration being, the enlarging of arm holes. I choose a cotton batik fabric. The results were very nice. I loved the hem of View B. I do miss the pockets. I like the longer length. Again the bottom was a 1X and it easily accommodates my 2X/3X hips.

View B – Back

Several cautionary notes: The some of pattern pieces are labeled 1, 1A, 2, 2A. The A pieces are for View B. That tripped me up. Also there is an error on step 13 of View B. You do not sew past the circle at the pivot point on side hem. I again exchanged emails with Coni Crawford who confirmed this. This pattern does add a bit of bulk at hips, which I normally avoid, but in this case, it added ease and shaping. Overall the pattern is fairly easy, and  I was able to make myself the garment that had caught my eye.

Posted on Leave a comment

The Great Northwest and Sew Expo

I left the cold wintry northeast for the slightly more mild northwest. Destination, Seattle Washington, Puyallup Washington, Mt. Rainier, and Portland, Oregon.

First of all, like many of you, I have no fabric stores locally that offer a wide selection of quality garment or fashion fabrics, and those that do offer a limited selection, and charge a premium. So, the thought of attending a large sewing expo was thrilling. I had attended the Worcester, Ma expo which paled in comparison to the Puyallup sew expo. The parking was very accessible. The crowds were excited but pleasant. The vendors were excellent, splitting evenly between quilting and general sewing. I attended a couple of the lectures. Organization and facilities were good. I spent a long day, covering all the vendors twice. I did the expo in one long day. Highlight of the show was when Coni Crowford personally measured my high bust, which I found out was 2″ smaller than I thought. I bought my first regular size pattern in decades (non plus sized). Hurrah to me and my new healthy lifestyle.

We then headed to Mt. Rainier for a stay at National Park Inn at the Longmire entrance. First day was gray and snowy with no views of peaks or high country. The weather forecast was not promising, so we had planned an early departure the next morning. But, fortune smiled upon us, and the sun shined and for brief times we could see the mountain top. So awesome. We traveled up to Paradise and rented snowshoes, and did a 1.3 mile trail, with amazing views of Mt. Rainier. Having not packed for snowshoeing we layered on the clothes we had. This was also the debut of my new twill pants, with two pairs of leggings layered underneath for warmth. We looked like vagabonds, but it was a blast. We dined at Copper Creek Inn Restaurant on the outside of park, a bit expensive but worth every penny, as the food and service were both great.


We then headed to Portland, Oregon. It was a long boring drive. We saw way too much of Route 5 this trip. We visited three places in Portland. The first stop was Fabric Depot. The entire store was on sale for 25% off. Wonderful selection of quilting fabrics, and fair selection of fashion fabrics. I was a bit shell shocked by prices of the fabric, and many of the offerings were dry clean only, or hand wash. If I am going to pay $$$ for fabric for a garment, I want to be confident that it will hold together. I ended up with some really funky denim. I also bought some sashiko thread and zippers for future pants.

The second stop was my all time favorite. The Mill End store in Milwaukie, Oregon. Absolutely fabulous. They had a good selection of tencel, ponte knit, scuba knit, and linen. The linen was 25% off already great prices. I left there with a large amount of fabric, and then needed to purchase another suitcase. A quick stop at Goodwill, and we found a nice suitcase for my fabric purchases. Luckily, Southwest allows up to two bags per person. That was much cheaper than mailing all my fabric purchases home. Just a note, the Goodwill stores out west are much much cleaner and well organized than any I have visited in the northeast, and I am regular thrift shopper.

The Pendleton wool outlet is very close to Mill End store, and worth a stop. I picked up a few small items but in general, there was not much to tempt me. Living just 30 minutes from the Dorr Mill Store has spoiled me for great wool selection and prices. This was my last stop of the day, and I was exhausted.

The final day we stopped by Pacific Fabric in Seattle. I bought some more funky denim, and a lovely shirting from their bargain table. At some point I went to ask my husband’s opinion on a fabric, only, to find I had approached a complete stranger instead. At that same moment, my husband was unknowingly snapping a photo of the store. How embarrassing! But the gentleman said he liked the fabric, so I bought it.

I have much work ahead of me and I am looking forward to every moment. Total yardage purchased just under 40 yards. Yikes!

Posted on Leave a comment

Photo Gallery of Recent Makes

A collection of recent makes. Most of these require either grading between multiple sizes, or grading beyond the largest size offered on the pattern. There is even one self drafted pattern done using drape methods.

Self drafted shirt pattern, using draping method, with the help of David Coffin’s sew along on facebook. This first is made in a lovely rich brown lightweight linen. The second is made in medium weight linen, which is buttery soft in both color and comfort.

This is my Burda 6714 10 gore skirt, which has a lovely drape. I modified slightly by skipping the elastic and putting in a fixed waist. Done in a swishy light washable wool. Love it! Displayed on my dress form.

Petite Plus Patterns, Flared Skirts by Kathleen Cheetham. This required grading up a bit beyond the largest size waist and hip measurements offered by the pattern. I love the look, and feel of this skirt, and the pockets are both functional and a flattering design choice.

Tina Givens, Maria Tunic which required grading XL bust to 2X waist and hips. I adore Tina Givens designs, and lagenlok apparel. This is my latest attempt. I was swimming in my first attempt, but managed to refine it. So comfortable and flattering in a soft medium weight linen. The bell sleeves make me feel feminine and dressy.


Sure Fit Designs – pants pattern, with fly front, side pockets, and fitted waist band. Pants have been a struggle for me. I have a challenging crotch curve, with large abdomin and large buttocks. I finally have comfortable pants for both sitting and standing. These are made in a soft gray brushed cotton twill with elastic in back waistband for added comfort.

Callie’s Nightgown from Everything your Momma Made. This is a fast and easy make. I tweaked pattern a bit, by closing up the neckline. I also had to draft 1x bust to 3x sleeves and waist and hips. So dreamy to sleep in on cold winter nights.

Daisy tunic from Style Arc. I tweaked the neck and shoulders for a better fit. I made the sleeveless version in a cool light blue cotton perfect for hot summer days. The second make was long sleeve in pink medium weight linen, perfect over pair of leggings.

Chamelon Weekender Dress by Hot Patterns. This jimper can be worn solo, or with a little something under making it multi-seasonal. I love wearing this on errand days.

Posted on Leave a comment

Pants!

Well, there comes a time in every quilters life when you find yourself, buried in quilts. This past year I recently downsized and moved and found I had about 3 times as many quilts as I could ever need or store. I have been funneling my efforts more and more into fashion or garment sewing. Pants have eluded me. But, this month, I finally managed to put together a comfortable nice fitting pair of pants, with pockets and a fly front.

Being a short obese older woman, has made finding comfortable fitting pants difficult. I spend much of my time in stretch knit pants when I am home, and in skirts and dresses when I travel out. Ready to wear just does not come close enough to my unique shape. Being from the northeast, I miss the warmth of pants in the winter most of all. So, I started my quest for perfect pants pattern.

I tried several published pants patterns, by the Big 4 pattern companies, and several independent pattern companies, trying to use only patterns that included my waist and hip measurements. But, nothing fit and looked quite right, until I used the Sure Fit Designs system and drafted my own pants pattern. My first muslin was very very close, and my second muslin was wearable.

For the gory details, my measurements are 45″ waist, 55″ high and low high hip, 5’4″ tall, with short inseam, and a very challenging crotch curve. I am intermediate sewist, and this was my very first fly front. I am planning on making my next pair in blue gray twill, and my third pair in a lovely black linen. The thought of comfortable pants in cool and attractive material has me over the moon.